
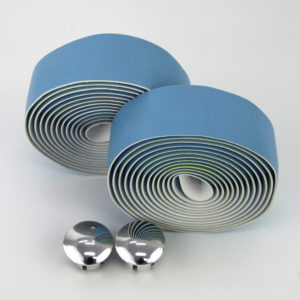
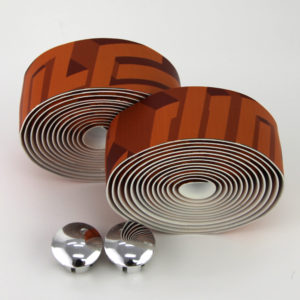
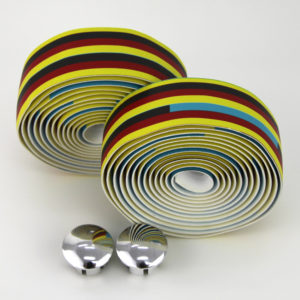
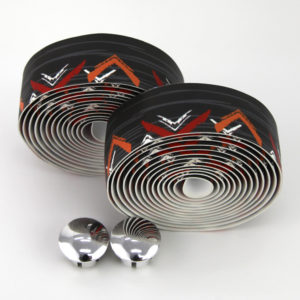
Cycling Handle bar Tape
FEATURES
Comfort
Anti-Slip
Shock Absorbent
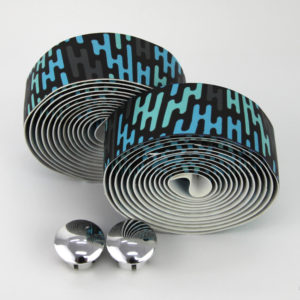
Extra Long 235cm per roll – suitable forall Road bars & Wing Style Handle Bars
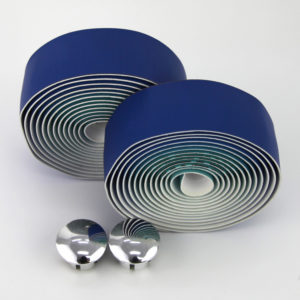
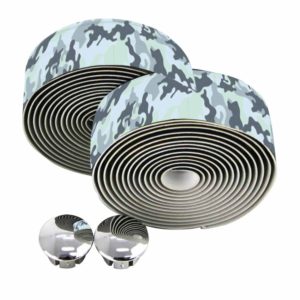
Limited Edition – Bespoke The Big Ringdesigns – add-on custom flair
Quality Unique Look Finish & Feel
SPECS
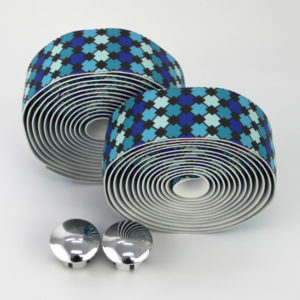
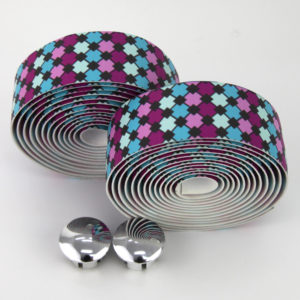
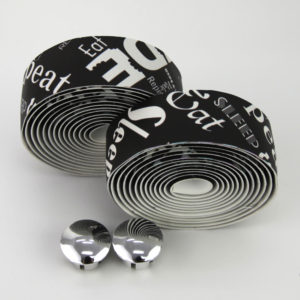
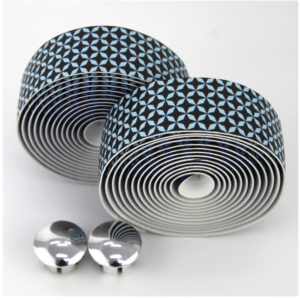
2 x 235cm Rolls ( extra-long )
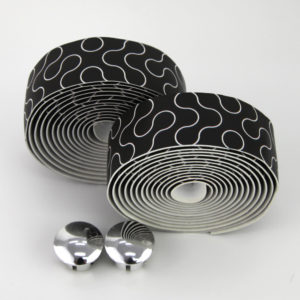
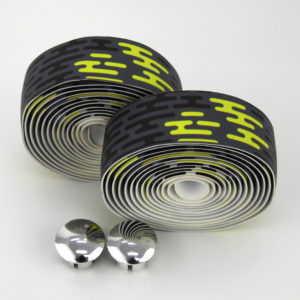
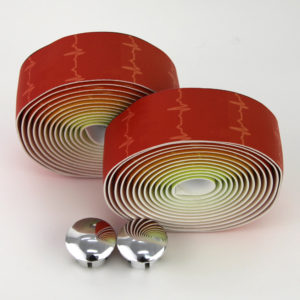
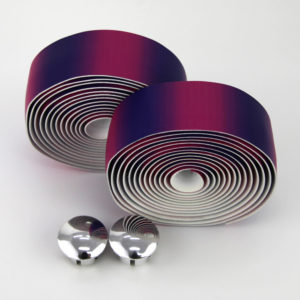
2 x Deluxe The Big Ring Bar Plugs
2 x Finishing Tape
2 x 9cm Back of Brake Lever Strips
1 x Detailed Fitting Instructions inside
Back of Tape has Silicon Grip Track -for easy Trouble Free Fitment & AdditionalShock-Dampening
Tapered EVA/PU Tape edges forsmooth stackable overlap
Overview
The Big Ring Custom Touch Road Racing Handle Bar tape offers exceptional vibration dampening and cushioning with excellent grippy feel and great wearability via the use of a proprietary mix of quality EVA foam PU, Siliconand Textile construction materials.
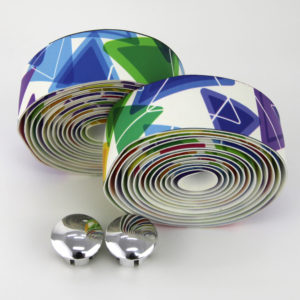
The Big Ring Custom Touch Road Racing Handle Bar tape is made with a unique Textile Surface Treatment that gives a vibrate glowing high resolution graphic and a fine textile grip surface.
The Big Ring Custom Touch Road Racing Handle Bar tape also comes with the latest in fitment technology – instead of using the traditional adhesive track with wax paper back that has to be removed, the tape comes with silicon grip-track that is very grippy but not adhesive, this grip-track also has great high frequency dampening quality’s as well enhancing bar feel. This silicon grip-track makes it easy to remove and recoil the handle bar tape as needed on the initial set upon the handle bars, this makes the task of fitting your own handle bar tape MUCHeasier – particularly when coupled with The Big Ring’s detailed fitting instructions. This silicon grip-grip track even makes it potentially possible to unwrap and rewrap the bars at a later date without too much trouble.
If your riding a current model bicycle it is likely that it comes with Wing Style Handle bars, which look trick and offer more aero but standard length Handle Bar Tapes which are supplied by 95% of the brands are 190cm-200cm which fall well short on giving the wrapping length required for the wider diameter of the Wing Design Bars. The 35cm additional length we supply per roll helps you get another 2-3 coils which will ensure that flats of the Handle Bar covered enough for proper hand placement and also cover unsightly cabling.
No other accessory on your bicycle has the ability to revamped look of your bike so quickly, the addition of fresh handle bar tapetakes your bike form looking old and worn to havingdistinctive fresh new look!
With 22 Matching Bespoke matching KIT-ONE designs to choose from thisrange of handle bar tape is graphically unique in bicycle world, giving you more choices to really personalize and match your kit theme in ways not previously available to the unsponsored rider.
Quality Bar tape adds the finishing touches to your machine, it’s not there just to personalized lookof your machine, most importantly it serves the important function by absorbing road vibration and providing a grippy surface for you to hold onto improving your ride comfort and control.
The Big Ring Performance handle bar tape is ideal for all types of road riding form hot too wintry conditions.
RETURNS/WARRANTY:
Please contact us within 7 days of receiving your product if you decide for any reason to return it. New items have 12 months warranty against manufacturing faults, normal wear and tear is excluded.
Contact us at the info@bigring-cycling.com if you have any issues or concerns.
Our goods come with guarantees that cannot be excluded under the Australian Consumer Law.
You are entitled to a replacement or refund for a major failure and compensation for any other reasonably foreseeable loss or damage. You are also entitled to have the goods repaired or replaced if the goods fail to be of acceptable quality and the failure does not amount to a major failure.
FITTING INSTRUCTIONS PERFORMANCE ROAD RACING HANDLE BAR TAPE
Quality EVA/PU, Handlebar Tape.
3mm Extra Thick Design
Includes 2 x rolls of 200cm x 3cm Handle Bar Tape, End caps, 2 x 9cm sections of Matching Handle Bar Tape (for covering the back of the lever) 2 x Pieces of adhesive Finishing Tape and optional clasps.
Self-Adhesive centre strip to felicitate easier fitment
Bespoke Unique – The Big Ring Designs.
Made in China for The Big Ring
Weight: 60 Grams tape only.
The Big Ring Performance Road Racing Handle Bar tape offers exceptional vibration dampening and cushioning with excellent grippy feel and good wearability via the use of a proprietary mix of quality EVA foam PU construction materials.
No other revamped part on your bike has the ability to take your bike form old and worn to having a fresh new flavour quicker than a wrap of handle bar tape!The Big Ring Performance handle bar tape is ideal for all types of road riding form hot too wintry conditions.
The range is graphically unique in the bicycle world giving you the choice to really personalize and match your kit theme in ways not previously available to the unsponsored rider.Quality Bar tape adds the finishing touch to your machine, it’s not only adds some personality to your bicycle, it actually serves an important function by absorbing road vibration and providing a grippy surface for you to hold onto, improving your ride comfort and control.
FITTING INSTRUCTIONS
Overview – Wrapping Road Racing drop handlebars is a skill that requires practice and patience. The finished job should look tidy and clean when done.Handlebar tape can be made of many different materials and blends of materials, the amount of stretch and the amount of strength the tape has may be different to what you have used previously. If this is your fist time using the printed graphic The Big Ring Performance Road Racing Tape, grab a piece by the end and pull on a short section to get a sense of the tensile strength. Being too aggressive in the wrapping process may lead to inadvertently breaking the tape – so keep that in mind. (The Big Ring Printed Graphic Performance Tape is really strong and very hard to break.)
Wrapping of the bars should begin at the end of the drop handle bars and work upward toward the brake hoods, before you start make sure your brake hoods are pulled back to expose the leaver body.
Before starting the wrap consider where to end the handle bar tape and keep that in mind while you coil the tape to get the desired amount to layer for thickness and even spaced wrapping.
The direction of wrap is important as it helps minimize loosening of the tape. As seen from the back (the rider’s point of view) the stress is from griping is outward on each side of the drops. Consequently, the right side should be wrapped in a clockwise direction while the left side should be counter-clockwise.
On the tops of the bars, because riders tends to pull back on their hands, the wrap direction should ideally change to counteract this stress, the direction of wrap can be reversed as you transition to the wrap above the levers but this is not an absolute need.
Remove your old tape, now before you start your new handle bar wrap is a good time to replace inner or outer cables if required, make brake lever Hight adjustments. Make sure the handle bar is clean and all old pieces of loose adhesive are removed and the anchoring bands of reinforced adhesive tape that hold the outer cables to the handle bar are in good order and securing the outer cable securely to the handle bar.
Wrapping Procedure
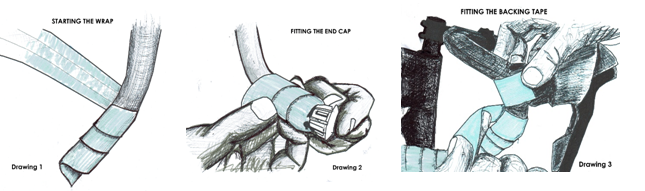
NOW ! Start the tape at the underside of the drop bar end, have about 5-10mm of extra tape extending past the end of the handle bar, coil one wrap past the end of the handle on the Right side wrapping in a clockwise direction (from the rider’s view) the Left side is anti-clockwise (from the riders view). Pull 10- 15cm of the wax paper backing off the underside of the Handle Bar Tape, enough to do 3-4 coils. Pull the tape with some tension and wrap three or four times as you move forward on up the bar. (see drawing 1)
At this junction stop wrapping keep some consistent tension on the tape and tuck the extra tape into the end of handle bar and insert and tap the Handle Bar End Plug into place, this will secure the end of the tape in place and stop it uncoiling. Inspect that the plug is tight and the tape looks tidy. Correct as needed before proceeding. (see drawing 2)
The Big Ring Professional Racing Handle Bar Tape has an adhesive strip that runs along the middle underside of the tape. Pull with consistent tension and as you are overlapping to the next coils make sure that the adhesive is on the bare handlebar just past the previous edge of wrap. Pull off the wax paper backing in 10-15cm sections as you go keep consistent tension on the tape. (see drawing 1)
Keep wrapping towards the brake lever with consistent tension the whole time, ideally you want to finish the last coil before the change in direction just below the brake hoods -this may take some practice with the coil spacing and tension on the tape to get this right. Getting it right may require some going back and forward and rewrapping to get the length right. Once at the bottom of the brake lever this is when you can reverse the direction of wrap.
Take one of the short pieces of matching 9cm handle bar tape, remove the wax paper back to expose the adhesive centre line, wrap the piece evenly around the back of the brake lever clasp and place either side of the brake lever body, be wary of little holes in the brake lever body which line up with rubber lugs on the inside of the brake hoods, if the backing tape is going to cover these lugged areas trim off that part of the tape. (see drawing 3)
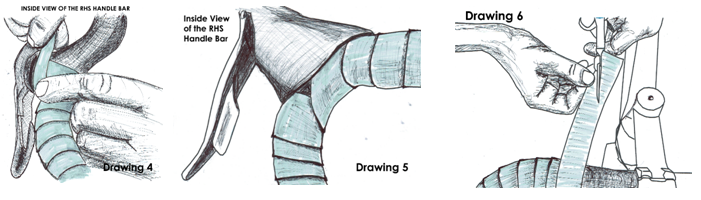
Starting at the bottom of the Brake Lever, wrapping towards the inside of the brake lever arc up around the inside of the brake lever, once at the top coil over top and start to layer your wrap again towards the stem around the tight bend of the handle bar. You know you have it right when the layering of the wrap is stepped like house tiles going away from the stem, the stem being the peak of the roof. This staggering/layering direction is important as a most the riders hand pressure goes to the outside edge of the handle bars away from the stem, this way the tape edges will not pull up and catch on the surface of your hands. Then continue along the handle bar toward the stem. (see drawing 4 and drawing 5)
Correct any errors as you go by unwrapping the tape and re-working the area again.
Keep wrapping toward the bars centre while maintaining a consistent even wrap and wrap past your ending point by at least two coils if possible. Use scissors held square to the bars and cut a vertical intersecting line where it should be ending. (drawing 6)
Use your piece of finishing tape to hold and neatly cover the end edge of the handle bar tape, wrapping in the same direction as the tape. It is best to start the finish tape at the bottom of the bar. Wrap with tension using care to maintain a straight wrap, laying the tape down without crinkles and continue to wrap until you are out of tape.
Wrap the other side of the bar as a mirror image but starting in the anti-clockwise direction at the bottom of the drop bar.
Time: Up to 30 minutes for first-timers; 15 minutes or less for experienced mechanics
SUPPLEMENTARY TECHNIQUES
In most cases if you follow the directions above correctly you should have no problems but some people grip the bars extra hard and really throw the bike around in a sprint, as a result they always have trouble with the coils slipping as time goes on. If this sounds like you, you could try applying a quality double sided sticky tape to the bars before you start to Handle Bar Wrap this will give extra adhesion hopefully counteracting the additional grip torsion from the rider .


